Posts

Showing posts from 2023

Pulpitis analogy

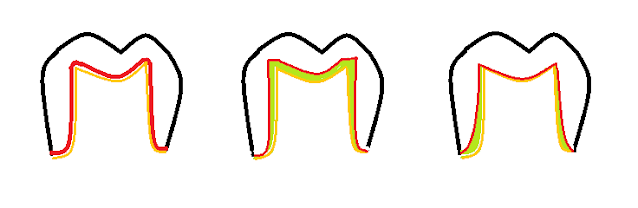
 I thought of a good analogy as to why pulpitis pain can be so severe for our patients. I don't know how useful this will be in a clinical scenario but it may come in handy in the future. Have you ever put a ring on that was too tight and you were scared because you knew that if you couldn't get it off at first then it would be harder and harder to get off? The problem is that as the finger is irritated and compressed, the blood flow increases to the area and the soft tissue swells. On top of that, The ring is a hard material and doesn't expand in response to the swelling tissue. The same is true in a tooth. The tooth is the proverbial ring and the pulp tissue is the finger. Localised insults cause an increase in blood flow to the area due to the inflammatory cascade but the pulp is entombed in the tooth and there is nowhere for the excess pressure to go and this increase in pressure causes firing of nerve endings that manifest as pain. If we burn our skin, the skin swells,

Cutting into the wrong tooth

 I had a mishap just a couple of days ago where I had to remove a crown to perform endodontic therapy as the crown eventually required replacement. It was a lower central incisor and all the lower teeth had been crowned with the same white, monotone, textureless ceramic.I was very paranoid about cutting into the wrong tooth as all the teeth appeared the same. I counted mesial to distal, correlating the tooth to the xrays, counted, and then counted again. Finally, I made a bur mark into the tooth to mark it and got into cutting. Somehow, I still managed to cut into the wrong tooth and ended up sectioning halfway through the contralateral central incisor before I realised my mistake. This is a very real risk in these situations and I put it half down to how uniform the teeth looked, half down to my stupidity and carelessness.  In the future, in a situation like this, I will be making a mark on the tooth with an indelible marker before double checking and triple checking the tooth. The is

Temporising endo access cavities and removing cotton pellets

I have recently been getting back into endos after spending the past year referring them to the principal dentist who was an endo aficionado. I find endos quite difficult, therefore time consuming and draining. Logically I know that the less I like something, the more I should do of it to become proficient but I thought that I had reached a point in my career where I could focus on my special interests. However, due to changes in my work circumstances, I have to take on these procedures again.  I have recently gone through the All things endo online course from Ashley Mark in the US (https://all-things-dentistry.teachable.com/courses). It was a very cost effective course that gave a good refresher for endo knowledge. The main benefit I got from it was the repetition of recordings of endo accesses. This is the most important part of the endo procedure and improves the outcome of each step follow this. Seeing this being done over and over with some tips to give confidence to know that I

Update

It has been a turbulent year from my end. Lots of changes at work as earlier in the year, the principal dentist and my mentor at the practice I started at suddenly passed away. I stayed on to help the transition after this but have now become the main practitioner at this practice. After building the practice for over 30 years, there was a significant and loyal patient base with a large amount of complex prosthodontic and implant work. As a result, there is a lot of complex work for me to maintain and inevitably a lot of complications and periimplantitis. Luckily we have arranged for an experienced dentist to come by once or twice a month to take over the larger, more complex cases but I am getting a lot of pressure from the practice to be able to tackle cases beyond my experience. I am trying to quickly upskill to be able to manage some of the more difficult implant and pros cases but it is a very fine line between pushing my boundaries and getting out of my depth.  I have started som

Digital dental photography textbook

I have borrowed the book: "Mastering digital dental photography" by Wolfgange Bengel (2006) as it was one of the recommended books from the Szabi Hant dental photography course.  It is a fairly extensive book and covers in depth very technical aspects of photography and aspects relevant to dentistry. I will not be reading the whole book as it goes deep into certain topics such as how camera sensors work and camera recommendations that are fairly dated. However I will try to extract the more useful points form this text and summarise them on this blog. I find that after taking photographs for some years I can take fairly well exposed, reproducible photos but it would be good to have a theoretical basis behind what I do to understand why a photo doesn't turn out as well as it could and maybe learn a few things about how to make my photos even better. The first chapter talks about why we take photographs in dentistry. Human beings are visually driven people and

Grey cards and custom white balance for dental photography

Grey cards are reference cards that are used to calibrate camera software. It ensures that pictures produced by the camera have colours that match the object being photographed. Many factors can affect the colour of the object, the camera sensor just captures the light reflected through the lens so mainly, factors that affect the light source affect the colour. For non dental photography, ambient lighting e.g flourescent lights, weather conditions etc can introduce colours that affect the object. In dental photography, due to the strong flash needed for illumination, most of these external factors are  inconsequential. This can be seen if you expose a photograph with the flash off, you should expect to see a black image due to the small aperture, low ISO and high shutter speed. This means that room lights shouldn't affect the image significantly. Potential flash factors that can affect object colour include: -The plastic cover in front of the flash can yellow with time due to degra

Work update

 Recently my contract at the hospital dental clinic ended and I decided not to pursue renewal. This means I have ceased employment there and passed on my patient care and headaches to other clinicians. I have stayed on for a couple of days with the university clinics on a casual basis but I am not sure how long I will keep that up. It is not a bad job to have but I find it extremely tiring and I am learning very little from it. What I do learn is how to fix clinical mistakes and I am thinking quite a bit deeper about the 'why'  of how I do my dentistry. I have started a couple of days at another private practice and the practice owner seems keen to pass on his knowledge and experience on to me. This clinic does fairly high end dentistry, a fair bit of fixed prosthodontics, implants and ortho. One big bonus is they have an on site lab and a digital setup which is a big gap in my knowledge as I have only worked analogue in the past.  Working 3 jobs has been working fine for the p

Vertical crown preparation first try

Image
 I have previously heard about vertical crown preparations and have watched some lectures on them but today I had a go for the first time to prepare a tooth with a vertical margin. Essentially a vertical preparation lacks a horizontal margin and therefore there is no defined stop for the prosthesis at the margin. The fit of the crown works on a slip principle where there is close adaptation of the crown and the tooth preparation. When there is shrinkage of the porcelain at the margins, a horizontal margin will have marginal discrepancies whereas a vertical preparation crown will just shrink higher up on the vertical margin and the seal will not be compromised. I have heard of a few methods to prepare the margin but was recommended to use the 9904 014 40 fluted needle flame tungsten carbide finishing bur for the subgingival vertical preparation. The smoothness of the bur provides a smooth surface and helps to avoid the bur digging into the tooth. A very light touch and wide sweeping mot

Photography and anterior waxup course

 Recently I attended an anterior waxup course and photography course run by Szabi Hant, a technician from Perth who works with Tony Rontondo, a Brisbane based prosthodontist. Overall, I could tell he was a very knowledgeable and skilled technician but not the best lecturer and demonstrator. Over the two days, this manifested in different ways.  The hands on component of the waxup course were him waxing up 3 anterior teeth on a stone model projected in a screen for the class. I think there was a lot of muscle memory involved and he proceeded through the waxup with some explanation as to what he was doing and important things to look out for but not much explanation in terms of finer aspects. For example, I would have been good to get his take on how to handle and manipulate wax and some more theory on instrument choices and wax types. To be fair, he made a valid point that the hands on component was the most important aspect of the course and the bulk of the time was spent on that, howe

A quick tip for prior to impressions

Ensure the teeth are relatively clean of food and plaque prior to impressions. I can't count the number of times I have taken an impression and bits of interproximal food come out with the impression. Usually in perio patients and usually in posterior teeth. Really heavy plaque will affect your surface detail capture and food will affect your accuracy and look gross for the lab an on the model. It will also affect your impression disinfection.  If there is really heavy plaque, give the teeth a good prophy or teach the patient how to use a toothbrush and reschedule. If the patient has recently eaten, give their mouth a good rinse and floss. When I haven't done this and there is food that comes out with the first impression, usually the second impression goes well.

Bite registration getting stuck in the mouth

Occasionally I have issues with bite registration getting stuck in tooth undercuts in the mouth and being difficult to remove. This is not a major issue as the bite registration usually flexes out or breaks at the point where it is stuck. This can make the bite registration more difficult to handle in the lab stage but is not a big problem. This is becoming especially common as I have switched to a more rigid bite registration material which makes it easier to trim and introduces less inaccuracy during mounting as the material won't deform as much under compression. Watch out for situations where there are multiple non adjacent missing teeth especially with kennedy class 3 situations with bounded saddles. Also kennedy class 4s can be an issue  with especially canines having deep mesial undercuts. Every denture aspect is improved in kennedy class 3s but the bite registration is made more difficult. In class 1 and 2 situations will flex out but 3 and 4 will get locked in. Try not to

Creating spacing under temporary crowns

Image
The issue with directly made temporary crowns are that the bisacryl materials are in general too accurate and once cemented, the lack of space under the crowns means that the temporary will always be seated high due to the hydraulic pressure on the cement. This is why when you are checking the occlusion with the temporary crown dry, everything may seem okay but once it is cemented there is usually a fair bit of occlusal adjustment required. The problem is amplified with thicker temporary cements such as eugenol based cements e.g Tempbond as the film thickness is extremely thick and it will be difficult to flow out as you seat the crown down. You may find that excessive occlusal adjustment leads to thinning of the crown and with conservative preps you may perforate or have frequent crown breakages during function. One strategy to overcome this is to use thinner cements e.g Durelon polycarboxylate cement which is technically a permanent cement. This increases the need to section off your

How to avoid breaking stone teeth off the model

It has been countless times that I or the technician have broken teeth off the stone model. Gluing the tooth back onto the model leads to unnecessary fragility and inaccuracy of the model. I am breaking them off less frequently these days but this involves identifying the risk factors for breaking teeth and employing strategies to avoid this occurence. Risk factors: Essentially, anything that introduces an undercut or a thin isthmus of stone.  - Tilted teeth especially proclined or retroclined incisors. Breaking off molars is less frequent as they are short and wide and have less severe undercuts -Teeth with reduced periodontium. This introduces black triangles for material to lock into and increases the undercut as the root diameter is less than the crown diameter. The more severe there perio, the thinner and weaker the root will become. -Triangular teeth: Same issue with black triangles -Porous stone: If the stone is poured with lots of bubbles, the void in the stone will act as a we

Count your cords

Image
A couple of days ago I  left retraction cord in the gingiva of a patient for the first time. Of course it just happened to be my mother. Thankfully, when I put in cord retraction cord, I am very careful to count exactly how many go in and count how many come out. Unfortunately on that day, as hard as I searched, I just couldn't find the cord. It was a small, size 0 cord and was placed quite far under the gingival margin. A mistake I made was not cutting the cord long enough so ended up putting two different pieces to surround a single tooth. The problem was once I removed one piece, I forgot where the second piece started and finished. Rather than continue to dig around the gum, I finished whatever it is that I was doing, brought her back 2 days later and tried again. The gum was not visibly inflamed but the area of the gum that exhibited bleeding on probing was clearly the place where the cord was present. I probed around the gum and found the end of the cord and removed it.  Less