Posts

Showing posts with the label diagnosis

Common dental photography errors Part 1

Image
 I'm continuing the theme of photography and records with this post with a few of the most common photography errors that I have made and learned from, but still make from time to time. These errors may harm the diagnostic quality of the photos. If we are going to the effort of capturing the photos in the first place it is important that we try our best to make them the best quality and as useful as they can be.  I made a post previously about some basic camera settings which may be useful for complete camera newbies: https://dental-tidbits.blogspot.com/2020/04/basics-of-photography.html  Buccal shots should be perpendicular to the teeth   This is one I learned at the Orthoed Minimasters. For orthodontically diagnostic images, the buccal shots must show the canine and molar relationship accurately. This means that the photos should be taken perpendicular to the posterior plane of occlusion. Most commonly, the buccal shots are taken angled from the anterior as we...
Sensitivity elsewhere during a cavity preparation

 Often times when performing a cavity preparation, there will be sensitivity elsewhere in the mouth either due to exposed dentine or caries. This can make the procedure more difficult in patients with rampant caries, recession or generalised wear. Pain relief is important at this time so there are several strategies I use in these situations: 1. Use rubber dam, This will remove the problem entirely, sometimes if the situation is nfavourable, rubber dam may not be possible to use for the entire restoration, but at least short term use of the dam can help get the bulk of the prep out of the way comfortably. 2. Give local anaesthetic in the other areas. You can be hesitant to do this because that isn't the area you are working on but in the end, we give anaesthetic to block nerve conduction percieved as pain so the patient can get through the appointment comfortably. Therefore, if the patient is agreeable, local anaesthetic at the other painful sites can be very useful to achieve this...

Electric pulp tester

 I got to use an electric pulp tester in the student clinics a couple of weeks ago and to be honest it was the first time I had used this since I myself was at dental school. I always saw it as cumbersome and anything that involves extra work is hard for me to take on board. I knew the theory that it was more useful in calcified pulps, but since graduation I have just tried the cold spray as a pulp test and if there was no response, I just shrugged my shoulders and moved on. I have found more success with using a cotton roll to soak the cold spray rather than a cotton pellet as it holds more cold and cover a larger surface area on the tooth. For some reason, the students favour cold spray on one of the very dense Q tips they have at the clinic which I find almost useless as the density of the fibres hardly hold any cold and the tip warms up very quickly. For very calcified pulps, the pulp tissue is receded further into the tooth, is less responsive to stimulus and have sclerosed de...

A case study with some lessons

Image
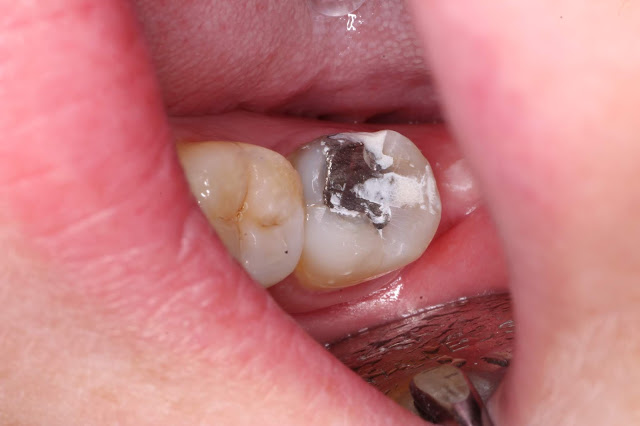
This is a string of photos I took almost two years ago and have been meaning to write about for a while. There were a few things I did wrong and a few lessons I have taken from the case. My memories are a bit sketchy on the exact details of the case but I will do the best I can. -The patient presented to me complaining initially of spontaneous pain to the lower left second molar exacerbated by temperature changes. To me that is sounding like a pulpitis of some sort, leaning towards the irreversible diagnosis clinically.The 37 tooth had a couple of deficiencies on the occlusal and lingual aspects as well as an occlusal amalgam and a mesial crack apparent. -As there was no visible carious lesion I chalked the problem down to the deficiencies in the tooth and patched them up with GIC. I didn't investigate thoroughly into the diagnosis, didn't perform pulp tests or even take an Xray. I am unsure why I didn't do this but possibly it was that the patient was very anxious and I w...

Heat testing for dental pulps

 Today I had a situation where I had to heat test some teeth to diagnose where the patient's pain was coming from. The situation was lingering pain from a lower molar elicited by hot and cold stimuli. The cold test was being inconsistent and wasn't reproducing the lingering pain that the patient was describing. I was given a Q tip to carry the cold spray but I find that looser materials such as cotton rolls or cotton pellets are better at carrying the liquid and will retain the cold for longer. It may have been that my method for cold testing wasn't efficient enough at carrying the cold into the tooth. The carrier for cold will warm up quickly once in the mouth and it may not be cold enough to elicit a response from the pulpal nerves. I wasn't getting anywhere so I decided to heat test the pulps. It has probably been about 5 years since I've had to do this but in the odd time that it is used, it is very useful in reproducing their pain. A few methods for heat testin...

Facebow mounting

 Today I made a few errors when recording and mounting a facebow record. Each facebow system works on the principle of providing 3 reference points to mount the maxillary cast. The anterior reference point is the occlusal plane of the maxilla and the 2 posterior points are the temperomandibular joints. There is a This approximates the position of the maxilla in relation to the terminal hinge axis but this can be any point in the arc. Due to this, another point is chosen in each facebow system to control where in the arc the model will be mounted. In this case there is a reference point at the infraorbital notch. This position will roughly place the models in the centre of the articulator in a vertical position.  In this case I forgot to use this fourth reference point and had the arm of the earpieces a tad too high. I was sure to make the ear piece bar parallel to the interpupillary line as this will give a realistic appraisal of any anterior occlusal cants on the mounted mode...

First equilibration

 Did what I would call my first equilibration recently. Technically in the purest sense of equilibrations I have done a few by building patients up who have lost vertical in a balanced position but this was the first reductive equilibration where the patient had a significant improvement very quickly.  The situation was the boss had done a small restoration on the distal surface of the 28 and the patient said things hadn't felt right after that so I was immediately thinking it was an interference in centric relation bite. I quizzed her more and she explained there was a strange feeling, not a pain but a discomfort that didn't feel right when she chewed sometimes but not all the time. Anytime patients describe this difficult to describe phenomenon, I think of an occlusal imbalance until proven otherwise. She also complained of halitosis that started after the filling which I chalked down to food packing (which I discounted) and mild periodontal disease or sinusitis as a cause....

Tips for diagnostic wax-up

During my free time I spent a little while playing around with waxing up anatomy on a set of models which taught me a lot about anatomy and the handling of wax. Below are some tips I thought of at the time: -Use good quality wax. Better quality wax will have the ideal melting properties and strength to allow ease of use and longevity. You don't want the melting point it too high as it will solidify before you place the wax. Too low and it will be too runny and will take too long to solidify making your waxup take much longer. -The model need to be very dry before you wax up onto it or the wax won't stick and will come off with manipulation or the creation of a putty stent -Use fine instruments to place the wax as they are more precise. For a long time I was using a lecron carver because that was all that was available for I trialled using an old, blunt sickle probe with good results. -Set up your work station for maximum efficiency. Keeping your instruments arranged neatly...

When is "good enough" acceptable?

I've heard it so many times before where someone says "well it's only the primary impression so it's fine" or "it's good enough". I do take issue with this line of thinking because it raises the question of: When is "good enough" acceptable? I would argue that we should be trying to do the best quality dentistry at every stage of the process or our results will suffer. If our primary impressions are bad, our special trays and planning will be compromised. Inaccuracies carry on down the line. If our cavity preparations are non ideal, our final restorations can't be as good as they can be. Which step is it ok to be bad at? Records such as impressions, bite records, facebows and photos are extremely important. All of the planning occurs based on these records. Planning is the most important part of dentistry because it sets up your appointment sequence, treatment to be done, treatment order. Why do you want to compromise on this most ...

Melker's occlusion 2: Variations in ideal occlusion

Class 1 occlusions are the ideal occlusions discussed in the textbooks but they aren't always present. In fact, the majority of people in the community will be class 2. The occlusal contacts represented as dots and lines in the diagram of the previous part is based on a class 1 occlusion. Class 2 and class 3 occlusions will show different relationships and achieving a class 1 occlusion post treatment is not always possible or desirable when considering the goals of the patient. It is important to know why we do what we do and why the goals of treatment is what they are so that we can bend the rules as needed. The main change with Class 2 and 3 occlusions is the anterior guidance component of the occlusion. distribution of occlusal contacts is possible in any occlusion as the reason why we aim to do this is to reduce the non axial loads through teeth when the muscles are at their highest force. The position of these contacts may change with different positions on the occlusal sur...

A note on caries detector dye

Caries detector dye stains less mineralised dentine and therefore can be useful in the detection of carious infected dentine. However they can also stain other types of demineralised dentine including affected dentine, DEJ and dentine near the pulp. I found it very useful as a new graduate in detecting areas where I had incomplete caries removal. I wouldn't put 100% confidence in it due to the risk of overstaining but it can be useful in ensuring that the margins are caries freed. It should be used in combination with other methods to detect caries e.g tactile sensation. Switching to a spoon excavator for stained caries near the pulp can ensure that you don't overprepare dentine in a critical area. I find caries detector dye especially useful in quickly progressing lightly coloured dentine as it closely resembles the colour of sound dentine. Often times when I thought I have cleared all caries in such cavities there is significant amounts of remaining caries often at the base o...

Looking back on my own thoughts Part 3

http://dental-tidbits.blogspot.com/2014/09/a-thought-about-differentiating-between.html "I had a good demonstration about how to manage a patient with painful teeth where pulp tests are ineffective. This generally means that the pulp is either too calcified to respond or the canal is necrotic or pulpless. In either of these situations, chances are there is some periapical involvement. A PA radiograph of TTP is a good sign of this. Also symptomatic questions are useful with a prolonged, intense dull pain which may wake the patient up at night. A way to approach this would be to get the patient to bite down on a cotton stick saying you're going to test the teeth and you want them to bite down with firm pressure on 3 teeth 1, 2 and 3 and to tell them afterwards which hurt the most 1, 2 or 3." A bit incoherent but I think I know what I was trying to get at. -Pulp tests will give you an idea about the level of response of the nerves in the pulp which is not 1...

Stop and stare (at your xrays)

As dentists we tend to be problem focused and so have the problem in mind when we analyse a situation. Interpreting xrays is one problem that this attitude can lead us into strife. Since we are teeth focused, we tend to ignore non dental landmarks on a film such as an OPG but forget we are responsible for interpreting everything that is present on any particular radiograph. Similarly, in bitewings and periapical radiographs  we may be giving them a quick scan for obvious pathology and missing subtler aspects such as widening in PDL or bony lesions. During endodontic treatment we may be so focused on the apex that we fail to notice things such as perforations in the coronal aspect or missed canals. Prior to extractions I would suggest that you have an OPG and zoom into the tooth in question and force yourself to stare at it for a good minute to notice the subtler aspects of the treatment to be performed. Often times what appears as conical roots from a distance may be masking an a...

Looking back at my own thoughts part 1

Continuing the theme of correcting my younger colleagues, I thought it would be pertinent to look back at my old posts and correct any concepts that I now disagree with. Looking back I can remember some of the situations that prompted me to post on such matters and seeing them again with the eyes of experience sheds a different light on the subject. http://dental-tidbits.blogspot.com/2014/03/blog-post.html My very first post on this blog. Apparently I did continue the blog haha.. http://dental-tidbits.blogspot.com/2014/03/011-soft-tissue-exam.html The plaque free before the examination is probably something I should do more of these days. It is not possible to examine a dentition well that is covered in plaque. If the plaque is so thick that it hinders examination I would love to plaque dye it and take photos to show the patient what the problem is. This can be a powerful tool to motivate. I don't check TMJ and lymph nodes routinely but it definitely wouldn't hurt to do...

Gutta percha points to track into abscesses

Some clinicians advocate the use of a small gutta percha point inserted into a draining or non draining sinus to track to the apex of a tooth then taking a PA radiograph. In my opinion this makes for a nice photograph but isn't always necessary. It is true that the abscess may not always be located directly next to the infected tooth (especially in kids whose bones are much less dense) but often the signs should be there along with a radiolucency on the PA to allow sufficient diagnosis without the addition of the GP point. Situations where a radiolucency may not be apparent may be where the root apex is fenestrated or closely situation to the buccal bone so little to no bone loss has occuredto allow the pus to drain through the soft tissues. The apical formamen may also be located a few mm from the anatomical apex on the buccal aspect so no apical bone is required to be resorbed to drain the abscess. There may also be overlapping of other structures e.g maxillary sinus that may h...

Blunt end roots

Not sure if I've made a post about this before. I am treating a case at the moment where premolar extractions and orthodontics in the past has resulted in root resorption of the remaining premolars and incisors. The combination of this and perio has resulted in very early mobility of the teeth in question. Orthodontics and root resorption is a separate issue but I wanted to make a post on the possible causes I could think of of short roots on an xray. In this case I noted the short premolar roots but didn't question it until I noticed that 4 premolars were missing. I then questioned about orthodontics and put two and two together. Other differential reasons I could think of were: -Apical periodontitis causing apical resorption: As far as I have seen, it is more likely that this resorption is oblique as the apical foramen tends to occur away from the radiographic apex whereas orthodontic resorption seems to occur symmetrically resulting in a generalised flattening of the roo...

Don't trust bitewings

Bitewings are a narrow view into a wider area. Generally, a size 2 film which the majority of dentists will use will show 4-5 teeth in view. This will usually miss the 8s, distal of the 7s and distal of the 3s depending on the anterior posterior positioning of your film. The posterior lateral surface of the tongue will tend to push the film superiorly and anteriorly and the curvature of the mandible will stop the film moving too far forwards. Caries will only present on bitewings when a significant portion of the buccolingual width is involved. Therefore as it is well known, they are useful for diagnosing interproximal caries where the buccolingual width is narrow near the contact point. However, a few things can confuse the interpreter of the radiograph: Occlusal caries is unlikely to show up on a bite wing until large. If you see a radiolucency at the base of a fissure, it is very likely to be carious. Buccal and palatal pit caries show up better as they penetrate into the tooth...

Keep digging

The more time I spend in clinical practice, the more I appreciate the idea that the more information we get off the patient, the better our treatment outcomes. As I begin to ask more questions, I begin to wonder how much I have been missing in the past. I am learning that dentistry alone can't win against an inhospitable oral environment. I spent a good hour with a patient today just digging through their history and trying to uncover the puzzle of his dental disease. I think a good rule is, "Nothing happens for no reason" or to put it another way "If the story isn't adding up then you're probably missing something." I think at university, we were given the tools to uncover these details but weren't taught how to use them. I also think that if you can agree that it is of utmost importance to modify the oral environment prior, during and after treatment, you can agree that we all need to dig a little deeper as to what the patient is doing to themsel...

Wear facets give a massive amount of information

Wear facets between upper and lower teeth can be a telltale sign of how a patient functions. A few points. Wear facets on cuspal inclines can indicate posterior function in a non axial direction.  Linear wear facets (i.e elongated, not a single spot)  can indicate a slide from first contact in CR to MIP. Large wear facets only indicate wide broad contacts not heavy contacts Worn canines can indicate nocturnal bruxism. Be sure to get the patient to manipulate their jaw to match the wear facets up. Patient who contact in extreme laterotrusion almost inevitably sleep brux. This makes a lot of sens to the if you point it out and it can be a good point to convince them to seek more diagnostics Patients who still have mammelons are unlikely to brux on anterior teeth so either they are trapped in MIP and exhibit more of a clenching habit or the have an anterior open bite relationship.

Pulp testing for calcified pulps

Root canal systems calcify and dentine undergo scleroses in response to function, ageing and insults to the pulp such as repeated thermal or chemical insults (erosion, caries). As the dentinal tubules close, the ability for fluid movement to stimulate the pulp is reduced. Deposition of secondary and tertiary dentine increases the bulk of avascular tooth structure between the environment and the pulp tissue. This is beneficial for protecting the teeth against further insult but does raise difficulties during diagnosis of dental pain. When we are diagnosing pain we want to identify the odd tooth out e.g if there is a pulpitis we want to identify which tooth has an exaggerated response to stimulus compared to the surrounding teeth or if there is a pulp necrosis we want to see which tooth has no response compared to the surrounding teeth. Dentine sclerosis and pulp recession makes all responses less obvious and can complicate diagnosis. Technically the majority of tests we utilise for ...